Saturday 20 November 2021

Airfix 1:72 Beaufighter


Again referring to RAF Radials by Spencer Pollard, I had a bash at the Airfix Beaufighter. Aside from the inexplicably fiddly three piece engine cowling, this is as close as you get to a perfect kit. Like all new release Airfix kits the panel lines are too deep and it lacks rivet detail but I have to give it top marks for sheer modelling pleasure. It really suits panel line accentuation and paint modulation and the decals are really nice. Lovely little kit for a pleasant little aeroplane. 

Thursday 11 November 2021

Another 1:48 Canberra


I didn't want a Canberra. I didn't need one. I've already got one. But this was a low ball Ebay bid that actually won. For a mere £11 I can't possibly complain.

I do like this kit. It's chunky, very easy to build, has plenty of options and the results are pleasing. This one, however, was not without problems. Someone had started the kit and glued the wrong halves of the ailerons together which made them almost impossible to salvage. They had to be filed down and reshaped with filler, and they're never going to look right.

A thing to note with this kit is it actually needs considerably more weight in the nose than the instructions say so that it will sit on its own wheels, Like the real thing, it has tendency to fall on its tail. The kit even includes a small plastic prop on the assumption that it will. This time I compensated and it does sit well, but the undercarriage is unlikely to take the whole weight of it for very long.

The photo here doesn't do it much justice but this is quite a nicely finished silver grey of my own creation. The instructions recommend an aluminium coat but but in my view it's a metallic grey and the aircraft itself does not appear in the bare metal.

I've been pondering why I like it so much and then it occurred to me that in the gloss white with the circular bubble canopy looking like an astronaut's helmet, along with the 1950's lines, there is something quite space age about this one that gives it a real presence.

If I had the space and the money I could easily do a dozen Canberra's because they always appear in interesting schemes, and though it's by no means a sexy aeroplane, or even an interesting form, there's just something about it. Though it was the first jet bomber, it was one of the last proper bombers in the conventional sense. It serves as a bridge between the ages where you can tell where bombers has been and where it's going next. You either get it or you don't. You really need to see one in the sky to fall in love with the Cannie. 

Trumpeter 1:35 AS90


Usually I can bang one of these out to a decent standard in a couple of days but this one was a real slog. I started it back in May and half way through lost all enthusiasm for it. It's not a good kit, the plastic is low quality and it's not all that accurate. In the end I skipped on the last few fiddly bits and slapped it with some paint just to get it out of my sight.

Having done that, I now regret it because a paint malfunction caused it to dry in uneven tones and it actually looks brilliant. This kit is more than the sum of its parts and it's a cheap way to fill the gap for a large self propelled gun. This is not a small vehicle.

This is the first time I've tried oil paint weathering on a vehicle and it really has worked. There's nothing better for rain streaking than a mucky blend of black, brown and white. I will probably revisit this one because there's a masterpiece hiding in this somewhere. If someone else releases a version of the AS90 I will jump at it because it can't possibly be worse than Trumpeters effort. I am quite surprised to be saying this. 

Wednesday 10 November 2021

1:72 Airfix Avro Lancaster B2


Notwithstanding a few finishing touches, I've just completed the Airfix Lancaster B2. I was inspired to build this having bought RAF Radials by Spencer Pollard featuring three masterclass builds in 1:72. I decided to use his build of the Lancaster as a visual template to see if I could get anywhere close to that quality.

Though Pollard's book is a great resource, there are some procedural omissions leaving you guessing how to proceed so it isn't a how-to guide, but it does give you a few clues. It's also a review of the kit which was nice to have if only to have my own impressions confirmed.

I'm a little less diplomatic than Pollard. This is a stinker of a kit. The fuselage was warped and putting it together was seriously hard work. The main landing gear assembly is just bizarre and no thought has been put into attaching the bomb bay doors which are only precariously attached by small sprigs. The engine mounts are also a bit of a problem. They don't really attach to anything save for the forward cowling ring and they don't stay in place.

For a new tooling this was a bit of a disappointment from Airfix. I don't much recall if its predecessor was any good but this release isn't a quantum leap in development. As it happens, I did build the 1960's Airfix Handley Page Halifax not so long back which is not without its problems, but the fuselage rivets make for a more detailed and enjoyable finish. I do recall that the transparent parts weren't up to much but I have to concur with Pollard's conclusion that the fuselage detail on this Lancaster isn't as good, and is too smooth and too even to be considered realistic.

One of the flaws with the latest batch of new Airfix releases is the panel lines. On this and the new Vulcan, they're too deep and wide, more resembling a diecast model, presumably done that way for amateur modeller satisfaction but they do nothing for accuracy. The fuselage looks more like one of Brunel's iron clad ships than an actual Lancaster. 

That said, I don't think it matters all that much if you get everything else right. The flaws in the kit can be overcome by a competent experienced modeller. Modelling, in essence, is the process of correcting a succession of problems either with the kit or from your own mistakes. 

Speaking of which, I was not pleased with Pollard's recommendation to paint the tail plane separately. I categorically do not recommend this approach. The stabilisers don't fit on to the fuselage particularly well and it took several dry fits before realising that the locator slugs had to be more or less completely trimmed off, and in the process of fitting them the aft fuselage started to split open. If I ever do this kit again I will add them even before joining the fuselage. I would also say that there isn't very much point in going overboard on the interior because most of it cannot be seen. 

As to the the paintwork, I must have done three or four RAF black/green/brown bombers in my time so this ain't my first rodeo. I went with my own mix of Tamiya colours. I've developed a reasonable instinct for it. The weathering was the real fun. Having watched a video on oil paint weathering, I went to town on this one, being that with oils you can simply wipe off what you don't like. Here I was able to fade and modulate the finishes in ways I have never succeeded with an airbrush. I've managed rudimentary pre-shading before but it goes wrong more often than not. Oils appear to be the way to go for now.

What really makes the difference on this one is the Eduard canopy mask. There's no way it would look nearly as good as it does without it. I'm now having to bend to the expensive truth that one should never attempt a complex kit without the laser cut masks.

There are a few problems with the end result that I may address with some advanced surgery later down the line. I always revisit my kits eventually. A second look often makes the difference between an average build and an excellent one. I had some problems with primer peeling and chipping, suggesting a release agent on the kit so I probably need to get back into the habit of washing Airfix sprues before commencing. This has left some surface imperfections I couldn't correct since I never seem to have a fully functioning airbrush.

With the help of Spencer Pollard's book I think I've produced one of my all time best efforts, if not the best. I'm usually a bit timid with aircraft weathering as you can very easily do something to ruin it, but this time I had the confidence to go much further. As Pollard points out, Lancasters did get absolutely filthy. 

To seal in the streaking and modulation I gave it a very thin coat of (the now obligatory) Pledge floor polish, which may warrant a matt overcoat. I was going to give varnishes a miss but there was slight decal silvering and the Pledge takes the edge of it. The demarcation markings on the wing were something of a headache and I still don't trust decal solutions not to melt the decal completely or ruin the paintwork. I used a heavily diluted Humbrol Decalfix which was just enough.

Airfix HP Halifax
As you can see from the Halifax I built just two years ago (click image for larger), I wasn't far off a decent standard but with printed colour pictures of a master build as a reference I was able to take it the rest of the way. The oil weathering and grey misting as suggested by Pollard has taken me to the next level. With a new standard now established I may dig the old Halibag out for a bit of a refurb. Those wing rivets you can see make for a pleasing finish.

I have to say I am somewhat disappointed with Airfix on this one. This is the newest large tooling of theirs I've attempted and was expecting something a lot better. The technology has got better so you wouldn't expect to have to address the same warping problems found on the Airfix 1962 Avro Anson.

The other problem is that they're putting 1:48 design & build philosphy into 1:72 kits. What works for the former does not work for the latter. Elaborate interiors are a complete waste of time, deep panel lines don't work and complex rudder/elevator assemblies are best left to 1:48 kits. I can see this Lanc being very fragile and requiring ongoing repairs.

For all that, though, I really cannot complain because, for all the griping, it clearly can be done well, it's reasonably priced, and what you get is a Lanc variant that nobody else does. It's a distinctive and unusual version and all credit to Airfix for taking the risk. I'm really pleased with it. 

Sunday 12 September 2021

Heavy metal - the Monogram 1:48 B17


Metal effect is a bit of a dark art. I had done a P51 Mustang using only Tamiya flat aluminium and it just didn't look right even with panel liner and off shade panels. For metal you really need specialist paints. I've gone with Vallejo Metal Color (Chrome) for this B17 - and I think it's worked. For the off panels I've used Tamiya flat aluminium which works for the effect.

As to the darkened panel lines, I used Tamiya Smoke - which is a translucent dark varnish colour. Unlike pre-shading, this is an after effect applied to the base coat. It takes a little practice and it woks best if thinned a little with Tamiya thinners, and then a light mist overspray of the base colour. I've since tried it out on the Mustang (which is now a test mule) and I'm close to refining the technique.

The chrome paint is not what I was expecting. It's a slightly whiter shade of Vallejo's aluminium but a second coat at close range with the airbrush will give it more of that polished metal/chrome look. I did a test panel but in the end decided the full polished look wouldn't look right for the model. The only high polish B17's are modern day classic warbirds which isn't what I was going for.

When it comes to metal finish, surface preparation matters a lot. Olives and greens will hide a multitude of sins but metal finish will show up every defect and the chrome paint just doesn't look right if the priming is uneven. I learned this the hard way and had to clean off the wings and re-prime. In most instances I get away with a rough prime job but for metal surfaces you need a full and even coat - not least to even out some of the surface defects.  

The kit itself is the old Monogram in a Revell box. It's essentially the same as the Memphis Belle B17F kit but I think this one is a little better. The dome on the top of the nose looks better than the flat windows. This would be a far superior kit if it wasn't let down so badly by the badly formed glassware. That said, the HK B17 in 1:48 is going to set you back easily three times as much money. With a little bit of extra time spend on filling gaps and sanding seams, this one scrubs up fine.

On that score, this kit takes a lot more work. It does mean scuffing off a lot of panel line detail being that it has raised panel lines, but it doesn't really matter. A smooth top looks fine and the underside isn't visible. I have built the Belle version of this and I tolerated bad seams to preserve the panel lines and it just looks poor next to this one. This one with the chin turret is the one to get. 

The one thing I will say is this is one of the very few kits where "paint before assembly" applies. I painted much of the fuselage before joining to minimise the risk of getting paint on the windows. Even though they were masked off, it saved me some worry. What I do like about this kit is the wings slot on so well that you don't need to glue them on. I built the wings as separate models and completed them before attaching. This means I can disassemble it for storage without damaging it. It's a big kit!

The interior on this kit isn't great but then it doesn't need to be unless you're doing a documented build. If you're doing it in the dark olive then chances are you won't see very much but in the bare metal finish you can (for some reason), so it was worth going the extra mile on the cockpit and the forward compartment. As with all the old Monogram kits, they could be better but there's nothing much wrong with them if you're prepared to put the work in.

I think this is probably my first successful attempt at bare metal. The A26 Invader I built using the Vallejo Aluminium looks competent but the chrome on this B17 seems to work better. I might have done more fuselage panel tinting had I known what works beforehand but I'm inclined to think less is more. You can overdo it.

Considering silvers and and yellows are some of the hardest paints to work with, I picked a real challenge here. For the yellow I used Tamiya flat yellow, building it up in several thin coats with a gloss varnish. I've had problems with gloss yellow consistency. Four coats seems to be enough for a truly even coat. I'm not too worried about the imperfections since yellow paint is much the same on real aircraft.

One the whole it's a relatively inexpensive, high impact project with lots of learning potential. I probably will come back to it to add a bit more weathering but for now I'm just happy to bask in its presence. I would recommend it to any modeller. Even a badly done big B17 is still a big B17. What's not to like?

Friday 21 May 2021

Heller 1:72 E3 AWACS


You would think a kit like this would be easy, and with only about thirty or so major components, and a reasonably good tooling, it would be a quick job. But what it lack in complexity is makes up for in scale which makes it something of a painting and masking challenge. I used almost two rolls of masking tape.

Build wise it's a bit of a rotter as it's quite clunky and the wings didn't align very well. With an aircraft of this scale, age and brand I wasn't expecting much, particularly since it costs very little for such a big bird. I don't mind though. It's nothing a halfway competent builder can't overcome. In its favour the decals are superb and caused me no problems whatsoever. Beyond that there isn't much to say about this one. It does all the talking for me. It's glorious. 

Tuesday 11 May 2021

Monogram Marauder


I think I was nineteen when I gave up model kits for other concerns. I was working on this precise kit, - Monogram B26 Marauder boxed as Revell in 1:48 when I concluded that without investing in an airbrush (which I didn't have the money for) I was not going to be able to do a worthwhile job of it and abandoned it mid-build. I don't know what happened to it - but there was unfinished business for twenty years. 

Happily I found one recently on Ebay for £25 in the original Monogram box and with extra decals so decided the settle the score. Surprisingly, for a kit as old as me, this is a really nice kit. It's almost as good as a Tamiya from the same era. Normally Revell/Monogram twin engine warbirds are clunky and require a lot of structural correction, but this one practically fell together with very little filler. Even the glassware is pretty good which is not usually the case for older Revograms. 

On this I've been quite sparing with the weathering. I haven't quite mastered paint modulation and I got to the point where I didn't want to risk ruining it. I may revisit it in the future but for the moment I have a perfectly nice and respectable 1:48 Marauder. I can lay that demon to rest.

This was my first attempt at invasion stripes which is actually a lot hard than it looks. But it is one of those modeller's milestones you just have to try. I'm glad it was this kit. Twice now has this kit been a marker in my development as a model maker. And isn't she lovely?  

Wednesday 5 May 2021

Something a bit different


I stumbled upon a book featuring Tamiya's Pink Panther LWB Land Rover in BAOR colours and I just knew I had to have it. I'd never had the remotest interest in building the Pink Panther, but sometimes you just get that flash of inspiration. And at less than £20 from the excellent Tank Museum online shop, it would be rude not to.

Though mine isn't quite as good as the one featured in the book, it ain't bad at all. I traded the plump desert tyres for some resin European theatre wheels from Accurate Armour and it really does look the business. I added various stowage pieces recovered from the bottom of my bits box, which aren't as good as handmade accessories but I just don't care that much. 

And then on completion I figured one good Land Rover deserves another. I went for the Hobby Boss Defender Wolf WMIK - essentially the same vehicle for the same role in modern times. Also an excellent kit save for the virtually unusable PE parts and inaccurate headlamp cages.

The result is two lovely little trucks. Quite a rewarding little project. I'm glad the range of military Land Rovers is quite limited or I could very easily end up with a collection.  

Monday 22 March 2021

Strip and refurbs


Last seen in the two-tone Royal Navy scheme, I wasn't happy with this one, and having just completed a Desert Storm Buccaneer, I had the decals and spares to make good of it. I put the wings down and added the ECM wing pods and tanks. Now it looks proper.

I do love the colour on this. It's a middle blue/neutral grey blend, darkened with a little black. It looks like a dark grey but ocean grey comes out a rich sea blue in certain lights and the gloss finish really makes it shine. As it happens this is a pisspoor kit and a strip and refurb job so it was never going to be a showcase piece buy all the same, it's a nice thing to have. Meanwhile, I've been on with a little side project...

Since taking this pic at 4am I've added a few other subtle bits of weathering but you get the picture. I actually built this precise model about twenty years ago and it's been sitting on a shelf in Dad's office for years, painted in the wrong colour with amateurish weathering. I've been eyeing it up for a while now and so I kidnapped it to give it a BAOR makeover. I was intending on doing the Berlin Brigade scheme but I think you have to paint that scheme during assembly. I also chickened out. It looks like a lot of faff and I didn't have quite enough paint for it.

There's a lot be said for strip and repaint jobs. That way you get twice the value from a model and you don't have to take up room with new ones. This week's modelling has cost little but the paints.

On both these projects I've mixed my own colours. The green on this Chieftain is one of my own making and the black is a mix of black and dark green. I wanted authentic colours on this one. It's nice to have the confidence to mix your own blends. Prior to now I would usually look for the closest match in the Tamiya range but I now have sufficient empty jars to play around - and now have as many mixes as paints. It's a lot of fun. But also, you end up using quite a bit of thinner thus end up using thinned paints by default which has resulted in better finished. This tank had about three coats of extra thin paint and it really does make the difference.

Refurbing is a good palette cleanser between major builds. It's usually when I potter and experiment, catching up on odd repair jobs and marginal improvements to my whole collection. It's a cost effective way to experiment with new techniques and a nice way to pass the time. 

Wednesday 17 March 2021

1:72 Airfix Jet Provost


I don't usually build 1:72 scale birds and certainly never this small. I wanted to build one for my dad who flew them in his brief air force career. It's basically the Vauxhall Chevette of the sky but a very likeable little bird. If somebody started making them new for private use they would certainly sell. 

Here the camera doesn't quite do this one justice. I elected not to give it a dark wash or panel liner because at this scale it would spoil it. Airfix have latched on to the fact that modellers like to accentuate panels so they add them to absolutely all of their range now, and in my view the grooves are too many and too deep for 1:72.  People rave abut the new Airfix 1:72 Buccaneer but I think it looks daft for that very reason and it's the reason I don't like the Corgi die casts very much - and certainly not now I can make better myself.

The kit, though, is lovely. You really get a sense you're looking at state of the art kit engineering when you open the box and if that is the standard of all new Airfix kits then their new releases are definitely worth a look. The updated V bombers could be very nice.

I like this one so much I built two of them. I did the silver-grey variant with the dayglow orange straps (though be warned the dayglow decals are useless). These little 1:72 birds work will as side projects and good for instant gratification. This one took just a single afternoon. An afternoon spent well, methinks. 

Italeri 1:48 F-14A Tomcat


It looks far better in this picture than it actually is. I did not do a good job of it. This was one of my first. I recently bought a second one so this could take its rightful place in the bin. My view is that if you're a serious modeller then the F14 is one to crack and anything less than perfect won't do so I'll keep going at it until I get it right.

I'm posting this one because I just want to rave about this particular kit. It's not particularly detailed and it doesn't have flaps or configuration options, but at £27, for a massive Tomcat, you can't really complain. The interior is very basic and the ejector seats could do with replacing with something better, but if you want an imposing "big fighter" then this will do. Any other brand of Tomcat will cost you substantially more.

The Tomcat is the one to crack largely because it does so wonderfully lend itself to advanced pre-shading techniques and marbling and there's a lot of scope for advanced weathering. It's an excellent canvass to get creative with. I plan to use the next one as a training experience with a view to doing one of the more advanced Tomcat kits in the future. As someone who generally prefers painting to the building, this is a nice kit because there are relatively few pieces and it's a fast build with no senseless interior ducting. It's basic and that's what I like about it. If you want convoluted builds, go for the Revell 1:32 Hornet. 

For those considering it, be warned, it is not at all small. It takes up twice the shelf space as a Tornado. It's about the size of an Su-27 which isn't small either. As it happens, I think the Tomcat is a much overrated aircraft and is only pretty from certain angles, but in this particular USS Nimitz scheme it does look the business.

Trumpeter 1/32 Messerschmitt Bf 109E-3


Trumpeter have established themselves as a leader in the field - and rightly so. This is a great kit with excellent detail and it's a nice subject matter. I took this one on particularly because of the painting challenge it represented and I think I did a pretty bang up job. I'd only been airbrushing a year. It looks like I skipped out on detailing the landing gear and I could probably go at it with a bit of panel liner, but I don't think I was that bothered because warbird generally bore me. I just wanted to see if I could crack the interesting camouflage scheme. As a painting challenge I absolutely recommend it and if you like your warbirds, there is nothing at all wrong with this kit. 

1:48 Airfix Hawker Fury


This is very possibly the worst kit in the entire Airfix range. I'm not a master modeller but I'm not incompetent, and I simply couldn't make a good go of this. Many of the pieces are malformed and the fuselage join is awful There's quite a lot of filler on this one and it lacks detail and texture. As it happens I think 1:48 is far too small for biplanes and there wasn't any way this was going to end well. It was a fun little experiment, but it went straight in the bin. In its defence, the decals were good - but that's all one can say about it. I'm sure somebody has made a good go of this kit, but it's never going to be me. 

1:48 Airfix Sepecat Jaguar


This is a frustrating kit because it's almost good, but is actually terrible. There aren't many issues with the main body of the aircraft, but the landing gear is absolutely pathetic and the parts don't even fit. It really lets it down - as does the complete absence of cockpit detailing. If you want to do a halfway decent job of this you have to buy a resin ejector seat and scratch-build a better interior. You can get after market landing gear legs but they're not much better. Meanwhile, the canopy doesn't really fit, the missiles are poor, and if you bought it boxed as Heller then the decals are rubbish as well. 

This one is my second attempt and it's not much better than the first. I hoped with more advanced skills I might be able to do justice to it but I have to resign myself to the fact that you have to be a master modeller and detailer to do justice to the subject matter.

I'm aware there is a Kitty Hawk production of the Jag in 1:48 and I may yet stretch to it and send this one to the aeroplane graveyard in the sky. I'm told it also has issues but it can't possibly be worse than this. Perhaps an amalgam of the two might yield results?

I don't know why I'm determined to have a decent Jaguar. It's not the fastest or the coolest, nor does it have an especially interesting combat record. It's not even nostalgia because it wasn't an airshow star particularly either - especially when they were displaying the Tornado. There's just something about it. It doesn't have to be pretty to be interesting. 

Hasegawa 1/48 BAe Harrier GR.7


I love Hasegawa kits. In 1:48 there aren't usually better companies. They've been pipped just lately by Hobbyboss but their classics are still first rate. Unusually, though, I didn't like this one.

The build was a bit awkward. The cockpit section is separate to the fuselage in order to paint and detail the lift fan, and it doesn't quite align. It's a bit of a faff. But then that's not really the problem. As you can see, apart from the improperly trimmed refuelling probe/nozzles, I did a pretty respectable job of this (even though the lightbox shows up the faults). What bothers me is that I don't really get a Harrier vibe off the finished product. Usually when I build something to this standard I get a sense of satisfaction. This left me feeling a bit meh.

As it happens, it's one of the best Harrier kits out there. Its a magnitude better than the Tamiya Sea Harrier Mk1 (which is dreadful) and much better than the decidedly mediocre 1:48 FRS2 from Airfix. The landing gear is better defined (although the main belly gear doesn't actually reach the ground) and the transparencies are good. I just feel like there's something missing.

Unusually, it doesn't come with a range of munitions and I have bought the Hasegawa aircraft weapons sets which may help bring it to life. My hunch is that 1:48 is actually not big enough being that the Harrier is such a small aeroplane. It's not by any means a large model and it's about half the size of the average fast jet. There is a Trumpeter GR7 in 1:32 I think I need a crack at.

If you're after a GR7 in 1:48 I suspect this is still the one to get, and with a bit of engineering and investment it can be brought up to standard, but I reckon when it comes to Harriers, go big or go home!

1:48 Revell AC-47D “Spooky” Gunship


Pictured here before I went to town on the weathering, it satisfied my two basic criteria for a fun build. It's big and it *was* cheap. For reasons unclear the price has shot up lately. Must have grown in popularity after the 75th anniversary of D-Day. This kit goes back to 1978 and originally came boxed as a Normandy Skytrain. I may yet repaint it as such.

As with Revell's reboxed Monogram kits, it's clunky, basic, lacking detail and with lamentable transparencies. The cockpit glassware on this was especially difficult to fit and I may revisit it for some major surgery in future. None of that matters though. You get a chunky Dakota with miniguns. The decals are terrible but finding after market decals isn't a problem if it bothers you. 

One warning about this. I said it was big and it is. It occupies almost as much space as the B17 in 1:48. It won't fit on many shelves. This one I did freehand with the airbrush. I have seen more elaborate attempts at this camouflage but my skills aren't there yet. The build itself was a walk in the park. The interior detail is a bit basic - but most of it can't be seen. I'm not a big one for going overboard on the interior. It just has to pass a cursory inspection.

Building this kit is largely reminiscent of the Revell B17 Memphis Belle kit. It has roughly the same flaws, and feels like much the same plastic. Slightly waxy with thick sprues. But as with that kit, if you're a halfway competent builder you can sort out the worst of the problems to produce something quite respectable. There is, I believe, a more modern kit of this by Trumpeter which will no doubt be a magnitude better (and more expensive), but I like these cheap and basic kits as palette cleansers after more complex and expensive builds.

I would recommend building a Dakota to any modeller. It's a lovely aeroplane and to be able to hold a large model of it just to admire it is great. Unlike may other aircraft, it's beautiful from any angle - and very possibly one of the most gorgeous aeroplanes ever built. And this one has miniguns. What's not to like?

1:32 Matchbox Sea Venom


I saw this on Ebay going for a song and I just had to have it. I remember wanting one as a kid but was told it would be too advanced for me - which is ironic because this is probably the most basic kit in existence. I wanted it largely because of the absolutely gorgeous box art which gave me a rush of nostalgia. I normally throw the boxes away when the build is complete - but not this one. 


I loved every minute of this build. It's a lovely antique kit with strangely antique feel to the finished product. It's let down by a lack of detail but then the real thing is almost as basic. I didn't have fun with the decals on this (when does one ever) as they were ancient and the adhesive had perished. The landing gear is also useless. I'll probably have to keep gluing it on after it falls off. 

This was my first 32nd scale aircraft. It wouldn't have worked at 48 scale as it's a surprisingly small aircraft, little bigger than a Jet Provost. I could have done a better job on the painting and it suffered from a bit of orange peel effect on the Humbrol grey. It did the same on a recent Buccaneer. This one was a bit of a revelation though. I'd always assumed the lower colour was a cream colour with just a hint of green, but the actual colour is closer to mint-choc icecream green and only takes on its cream shade when juxtaposed with the grey. And by the way, yes, those wing tank decals are as difficult as they look. I just about got away with it. 

I have to say, I'm absolutely in love with the Sea Venom now. It's an ugly, ponderous beastie but you never really understand a form til you model it. This little bird was a proper aeroplane. It just looks better in the sky. 

Airfix: can't beat the oldies


Kit technology has come on leaps and bounds and modellers now have far higher expectations. But there's something comforting about building a classic kit and I really do recommend it just to see the difference. As it happens, leaving aside that the transparencies are terrible, there isn't that much wrong with them. These two Airfix beauties above scrubbed up really well, and in fact, I would go as far as saying they're better than some of the modern ones. The modern Revell Lancaster from 1994 isn't nearly as good as this Halifax in terms of surface texture. The Halifax has all the rivets and imperfections.

As to the Sunderland, the finer features are a bit rough, but again, the riveted fuselage makes for a super accurate finish that's incredibly well suited to heavy weathering. Where the Sundy is concerned, there's no such thing as too much weathering.

Both these builds were relative easy with no major problems. The interiors are limited but there's even less point going to town on the interior on 1:72 kits than some 1:48 bombers. The Sunderland has issues with misshapen windows, and this photo makes it look better than it actually is, but in both cases I got a respectable build.

With Airfix being a long established company with an incredibly diverse range there is a major variance in quality and some are absolute stinkers. I recently built the 1:48 Hawker Fury biplane which, though produced in 1980, it feels far earlier than that. It's one of the few kits I haven't been able to bash into a respectable shape. And then there's the 1:48 Etendard IVP, which is absolutely fine but underwhelming in every respect. The Mosquito FB VI isn't up to much either. It's featureless and clunky.

That said, there's the English Electric Lightning and Canberra in 1:48, both of which are fantastic kits although they're not that old in kit terms. 1995 onwards is what I call new when recessed panel lines became the norm.

Due to budget constraints I have not yet had the pleasure of building many of the much newer Airfix kits but I have bashed out a couple of the 1:72 Jet Provost which is a lovely little kit with superb decals. If that's the standard Airfix is hitting these days then they still have a future in this game. The newly released Handley Page Victor looks amazing and I will, one day, get round to doing the Airfix Shackleton. When it comes down to it, Airfix will always be king of 1:72 scale. Revell are great across all scales but when it comes to 1:72 aircraft the crown belongs to Airfix.

As much as I love their kits, there's also a lot to be said for the box art. Probably one of the most overlooked popular culture genres of art, known by nearly all men of a certain age, is Airfix box art, particularly pre-1980. It's good to see them reviving the traditions.

Thankfully, Airfix are maintaining a classics range, republishing some of their famously awful efforts, but that much is understood in the unwritten contract. It's part nostalgia, and part frugality. The older ones are much cheaper and with so many after market parts around, they make for nice little diversions. Particularly the 1:24 warbirds. I just wish they'd re-release the 1:48 Buccaneer, even though it's one of their all time worst. I've built four of them and will happily do another.

If memory serves, the Airfix Lancaster isn't a bad kit, and some of the 1:48 monoplane fighters are easily comparable with Tamiya. When they're good, they're up there with the best. That's why Airfix is synonymous with modelling as an endeavour - and long may it be the case. 

Monday 15 March 2021

1:72 ICM ZiL-131 Soviet Army Truck


As a gift for my dad who collects 1:72 vehicles I decided to have a bash at one. This one is from ICM, a Ukrainian company I'd never head of. I've built three of four of their trucks now and I really like them. They're basic, easy to build, and there's nothing at all wrong with them. It also makes a nice change to step outside your usual groove. Here I've employed a lot of the techniques I normally apply to 1:35 vehicles. With a mixture of weathering powders (red earth brown and black) and rust wash fluid, this one has really worked well. Better than I expected. With aircraft less is usually more, but with vehicles, the messier the better. 

This one looks particularly good because of the contrast on the white body. I did a similar Ural command vehicle in Soviet dark green and though it looks ok, it just doesn't look as cool as this. The little red flash of the fire extinguisher and the orange indicators just adds that little bit of life to it. It's a nice little thing to have. I must have had to glue that wing mirror back on at least four times though. 

In the wake of this I will probably try my hand at a 1:35 Warrior MCV in UN white, Bosnia campaign. The desert one I did looks cool so it's worth a try. White is right!!

1:48 Revell FGR.2 Phantom


Building this beastie is why I got back into modelling in the first place. I've always wanted a top notch model of a Phantom. Of all the fast jets it's by far the coolest. To my eyes it still looks modern. 

This one is boxed as Revell but it's the old Hasegawa kit. Thus, there isn't much at all wrong with it. You can buy any number of resin cockpit components, but what's there isn't actually all that bad. I bought the Aires resin cockpit for this one but it was a bit advanced for my skills trying to shoehorn it in without doing serious damage to it. It doesn't fit at all well. The resin ejector seats are also not particularly good. There are better I'm sure. On this build I was content to use the seats supplied but with PE seatbelts. It's not by any means perfect but this was my first serious go at hardcore modelling.

As it happens, this one is the wrong colour and there are other accuracy issues with it, but accuracy on this build wasn't really a concern. I was going for something that looks good - and I think I succeeded. There's minimal weathering on it but I have used a Flory wash which does a lot of heavy lifting.

When it comes to Phantoms I think elite modellers have a tendency to overdo it, adding decals you can't normally see on the real thing, and going overboard with the panel accentuation and pre-shading. They do it because they can. Here you have to question if the mission is to showcase your skills or just make something you like looking at.

Since taking this photo in the lightbox I've added two Sidewinder missiles which sets it off nicely, but I think the definitive UK Phantom is the green and grey camouflage one. I think I'll have built one before this year is out. I have a second one in the stash because they're so bloody cheap. When they were sold as Hasegawa they used to cost around £50 but now you can get them for less than half that in the Revell box, so thank you Revell!

Build wise this one is fairly straightforward. Hasegawa are always at the higher end of the quality spectrum and there are no serious issues with this kit so far as any normal builder is concerned. The intakes need a bit of filler on the join and they don't quite align right, but that's fixable. There's no major engineering works to be done on this one.

Eventually you get the rhythm for twin seat fast jets. I have enough of them now, but the Phantom along with the Tomcat seems to be a skill benchmark so it's really worth having a crack at one. At less than £25 for an ex Hasegawa, you'd be daft not to. 

1:48 Airfix English Electric Lightning


This is a great kit. It's very basic but Airfix got it absolutely right. It's a nice easy build, everything fits, the detail level is good, it scrubs up well, there are plenty of livery options, and even mediocre modellers can make a good go of it. It responds well to washes and the decals are good quality. If only the Airfix Buccaneer from the same era had been this good.

Build wise there isn't much to tell on this one. There are mercifully few parts, and the painting is pretty straightforward. Here I've used standard Tamiya aluminium with a dash of grey to mute it. Specialist metal colour paints would look too raw on this, though a good chrome for the nose ring would have been great. The one pictured was sold so I'll try the chrome on the next one I have sitting in the stash.

Though this one is presently discontinued (I think) you can still pick them up for about £40 on Ebay. I think there's a rarity premium because if you have forty quid there are better kits to get, but if you like the Lightning you simply have to build this one. I regret selling this one pictured and my model shelf doesn't look right without it. It's a good companion for the Phantom and Buccaneer.

There's not much to say about this one. It's a nice model of a great aircraft and you shouldn't have any problems with it. Of all the ones I've built lately this was the most stress free and pleasurable. 

The Revell 1:48 B17 Memphis Belle


This has to be one of the worst kits in the Revell range. It's old, it's basic, and there's a lot wrong with it. The glassware sucks and the decals are a bit iffy. But... it is very big and very cheap, a lot of fun, and if you know what you're doing, you can make it look alright. There's plenty of after market parts if you want to go deep on it. You can just about see in the picture I treated myself to some resin wheels to make it look proper.

Here I've used a standard Tamiya olive drab and the flecks are done with a weathering pencil. You can have loads of fun weathering this one. Olive drab is a very forgiving paint so you can't really go wrong and you can easily correct when you do. The oil streaks are done with Humrbol black weathering powder and a paintbrush. As a test mule it's a great thing to have and in any case, having a large B17 looking in your living room is never ever a bad thing.

As you might expect, the interior detail sucks on this kit, and the less said about the ball turret the better. I elected not to do the Memphis Belle livery as I don't like the field green flecks and I don't like the cultish adoration of the Belle either. I wanted a standard and anonymous B17.

Ultimately, if you want a really decent one then you need to build the Hong Kong Models 1/48 B-17G but it will cost you at least four times as much. I will build one when the budget can stretch to it. If Steve Bowe's build is anything to go by then it's awesome.

Whichever one you build, keep in mind that this is not by any means a small kit and if you are at all struggling for space, you might want to skip on this one. Personally, I love this kit. I know it's absolutely horrible, but I keep revisiting it and I have dun every time I do. It's a nice big canvass to work on. and a nice thing to hold. And that's really what this is about - having fun and making nice things. 

1:48 Revell A26 Invader


This isn't one I would have chosen for myself. It was a birthday present. But no kit is a bad kit and I'm very pleased to make its acquaintance.

The Invader is a bit of an odd bird. By any standards it is not a pretty aeroplane even in the air. It does, however, make for an interesting build. This is one of Revell's fairly recent (by Revell standards) productions so it doesn't have the usual moulding flaws that go with Revell multi-engine warbirds. The detail is better than usual and the component definition on the interior is adequate. For once you can actually see it so it's worth the trouble to go the extra mile.

What's surprising about this kit is that even for a relatively late kit, it still has raised panel lines - but that's not really a problem on this one. It scrubs up nicely. For this one I've used Vallejo Metal Color Aluminium, and the mismatched panels are done by a gentle brushing with Tamiya panel line fluid. I think it's worked quite well but it's not completely there. I think it could do with a bit more weathering.

The reason I haven't done more is that I used a chalky aerosol paint I was told would dual as a primer, but it doesn't and if I mask it at all then it just pulls off the "primer" coat and the metal color. I quit while I was ahead.

Though there was something with this model that didn't sit right with me. I kept looking at it and one wing looked higher than the other. It was an optical illusion but on closer inspection the starboard wing is slightly warped and twisted chordwise. The wing joint didn't fit well either as I recall. Like I say, no kit is a bad kit, but some kits have serious problems. This is one of them.

If you're going to build this kit, I advise looking at it from all angles very carefully before painting and doing whatever you can to correct the shaping. What you get, though, is a nice little aeroplane about the size of an A10 and something just a little bit different that will stretch, but not break, all of your skills.

As ever with Revell you get what you pay for. This is a low cost kit and like all Revell budget kits there are issues, but they're always satisfying. The instructions are easy to follow, the decals are generally good, and if you know what you're doing, even their worst efforts can be beaten into shape. I have the Revell/Monogram B26 Marauder sitting in the stash and I'm sure I'll enjoy it as much as I enjoyed this one.

Verdict: Not one to repeat - but pleased I did it. 

1:48 HobbyBoss A6 Intruder


This is a f***ing wicked kit! It sat in my stash for over a year before I had the confidence to go at it. It looked a lot more complex than it actually was. The kit comes with absolutely everything. PE parts, metal landing gear, a solid instrument panel and a decent range of munitions. Moreover, it comes with lots of configuration options. You can have the wings up with the stowage rods as pictured or wings down with all the flaps out and the nose open. It even has a radar dish in the nose and the intake ladder is deployable (though it's a tricky PE job). This is not a beginner's kit by any means.

Build wise my only complaint is the way the front half of the canopy fits to the fuselage. The front join is on the fuselage only a thin bit of plastic and the canopy didn't quite align so I had a bit of sanding and filling to do. If you look closely you can see it's not perfect here, and I may revisit it in the future.

There is one other thing. The wing hinge. It's small, incredibly brittle and not really load bearing so mounting the wings up is not an easy job at all. Once I had it all balanced in place I set about it with strategic blobs of superglue otherwise it wouldn't withstand a light breeze.

Other than that, this is probably the best kit I've ever seen and at just over £40, though quite pricey, you really do get your money's worth. The instructions can be a bit vague and that seems to be the common theme with Chinese kits, but the full colour painting charts they come with are great.

I loved doing this one because I am big Intruder fan. Flight of the Intruder is one of the greatest films of all time, and it's better than Top Gun. That is a hill I will die on. It's also the US equivalent of the Buccaneer which I also love. They sit side by side on the model shelf. I liked this one so much that I probably will do another and have the wings down and do it in the Devil 505 colours as per the film.

After completing this I feel a bit of a fraud. It looks and feels like a pro build even though I know it isn't. I've a long way to go before I can call myself a master, but this one is hugely rewarding. My one regret is running out of steam and not doing the full bomb racks, opting instead for the single GBU48. I had a feeling it would all fall to pieces when attaching it to the aircraft and I just wanted it done by then.

If you're doing this, I recommend using a light grey for pre-shading the underside to save on white paint. This one is let down by the white coat on the underside being a little too thick - as a consequence of using black pre-shade. This time I used one of the Tamiya paint markers. To be honest, I'm not a fan. I had some issues with the paint coming off when peeling off masking tape and it was usually in those areas where the paint marker had been. I'm sure they do have their uses but I think stick to the airbrush for pre-shading.

I've since added Remove before Flight tags to the front of the bombs which really sets this one off. the tags are PE tags that came with some Eduard resin Sidewinder missiles which turned out to be pretty useless. If you want missiles, go with the Hasegawa weapons sets. They're a bit dated now but then so are most of the aircraft.

I have to say I'm super impressed with HobbyBoss. On the back of this I bought the Su-27 which just fell together and I have an F-111Dsitting in the stash. They're brilliant. They're not cheap but they're not stupidly expensive either and you certainly do get everything you could possibly want. If this becomes the future standard then producers of after market resin parts are going out of business, and if Tamiya and Airfix want to stay in the game then they have up their game considerably. 

1:48 Tamiya A10 Thunderbolt II


There are no bad Tamiya kits. There are good Tamiya kits and then there are good Tamiya kits which are starting to show their age. This one goes back to 1977 and has a few raised panel lines which don't do it any favours. The HobbyBoss one is probably a magnitude better. That said, this is still a good kit that pretty much falls together with no major build issues. If you like your detailed cockpits then you probably will want to look at a better ejector seat. 

This one I did freehand and was one of my first serious efforts with an airbrush. That it looks as good as it does is purely an accident. It was many more months before I would make one this good again. The picture here is one taken after a recent cosmetic overhaul, adding a few decals to the bombs and adding a bit more subtle weathering. The kit itself doesn't come with decals for the munitions so I've improvised with spares.

At around £23 online you're just not going to get more bang for your bucks on this one. The HobbyBoss one looks to be substantially more expensive so if you're a beginner, I reckon this is the one to play with. You get a decent and fairly large aircraft to play with.

I've only built two Tamiya aircraft and both have been good but what seems to be the case with Tamiya (having built dozens of Tamiya armour kits) is a certain stingyness. You get exactly what you see on the box but nothing more. They're now starting to feel incredibly dated and not keeping up with the Chinese equivalents who generally give you the works - be it metal landing gear stalks, PE parts and rubber tyres. That, more generally, makes Tamiya kits more expensive than they should be. They used to be prestigious market leaders but are now sitting in the middle of the pack. If you want a good value basic kit, mind you, this A10 will suffice. 

Academy F15E "Seymour Johnson"


Apart from the slight decal silvering I haven't done a bad job on this one. What really sets it off is the extra effort I went to on the missiles, using all the decals available and a dash of panel line fluid. This one was my first successful attempt at panel line pre-shading which I'm quite pleased with. I learned a lot on this build.

The kit itself isn't bad. The canopy comes with a thick seam running right up the middle. I sent off for a new one and to their credit they did send one but it had exactly the same problem so I ended up spending a small fortune on scratch removal fluids and sanded it off. It buffed up ok. I'm not entirely sure but I think this hit is an adaptation of the single seater kit in that the E variant bits seem like an after thought. The conformal fuel tanks, if memory serves, don't have anything like locator pins and they don't align well, and though there are guide points on the fuselage to fit the long bomb rails, they don't fit and the instructions are incomprehensible. I had to take a best guess.

This effort pictured is actually a refurb job as this was done over a year ago when I was still learning airbrush basics. It has since had the Mr Muscle treatment and has subsequently lost the cockpit detail (not that it was any good). A year ago I didn't really bother with the cockpit because if the outside was going to look bad then what does it matter about the inside. I had a certain (accurate) fatalism about my abilities last year. Since then I put the effort into the cockpit because there's more than a fifty-fifty chance of doing a decent job.

As it happens I will be revisiting this one again. This was the kit which persuaded me to buy some of the specialist metal colours for the exhaust panel area. I need to properly research it before diving in though.

If you're after an F15E this is probably as good as kits get. Notwithstanding the faults I mentioned, the rest of the kit is fine. The exhaust pots are a bit fiddly but not really a show stopper. If you're at all hesitant about repairing the canopy issue then I advise looking for a different kit but it's a skill you'll have to develop eventually. As it happens, the scratch remover fluid I have is a good general product to have around the house so it's worth the investment.

Other than that, there's not much to say about this aircraft not least because the F15E, though very sexy, is also really boring. It's a good testbed for more advanced painting techniques but it will do little to liven up your model shelf. You can have it in any colour so long as it's grey.

The 1:48 Airfix Buccaneer


I love Buccaneers. And I love this Airfix kit. Of all the 1:48 kits I've built, this is by far the worst of them. Nothing fits, it needs certain shape corrections and the interior parts are absolutely useless. I have no idea how this kit ever passed the quality exam or if there even is one but I'm very glad it didn't. It just wouldn't be fun otherwise.

This kit is a bit of a cult classic and you can pay anywhere up to £100 for one with a few after market parts on Ebay. There are plenty of accessories for the detailer and bags of after market decals. Personally I tend not to bother with the photo etch sets for this kit because they're not much better. The instrument plating from Eduard doesn't fit at all. If you're going down that road then it's best to get the resin parts, but if you ask me, the only bits that matter are the ejection seats. You can't really see in unless you go for an open cockpit - and I rarely do.

If you can overlook the horrible interior parts, the rest of the kit scrubs up quite well. You can get away with not buying after market parts. The only bit that really demands more detail is the wing join if you plan to have folded wings. There are PE parts for this but I wasn't impressed. They didn't add very much. I think that's where you might want to play around and scratch build something. 

This kit has a notoriously awkward fuselage join requiring a quite a lot of sanding and filler, and managing it without erasing panel lines is quite difficult. I recently invested in a panel line scriber but I'm not quite brave enough to use it yet. This kit is missing a few key panel lines that would make it look more convincing.

The best part, though is when the hardest job is done, everything else just falls together. I much prefer the painting to the building. I happen to have three of these and this latest Desert Storm variant won't be the last. I plan on a Raspberry Ripple version.

As a word of caution, though comprehensive the decal sheet, I think, isn't very good. They're low resolution and highly prone to silvering or just not sticking at all. In fact, paradoxically, there is nothing much good I can say about this kit yet I still love it the most. HobbyBoss could make one of their modern kits of the Bucc and I would love to see that but I would still occasionally go back to play with this one. There's a real "essence of modelling" to this build experience, and modern kits seem to have lost that. There's no real build challenge in HobbyBoss builds such as the SU-27 unless you're prepared to upscale to 1:32.

I would say to manage your expectations with this kit. No matter how good you are, this kit won't quite reflect your skill level because it is such a dog. To make this look right you have to be a master and go to town on it. I've seen it done once or twice but most efforts, including mine, are decidedly average. All the same, every self-respecting modeller should have one.

On this particular one I went with the Operation Granby scheme not least to try out my newly acquired pre-shading techniques. It didn't work. The recommended desert pink for this is the Alclad RAF Desert Pink but I was only able to locate an enamel which I've not really worked with since the days of Humbrol tinlets. The pre-shading worked ok but then I started running low and didn't have enough for corrections. For that I mixed my own desert pink from Tamiya remnants which didn't quite match so ended up doing a complete overspray, losing the pre-shading.

That then created problems of its own because Alclad products seemingly take a while to dry and there was still a gummy layer between the acrylic coat and the primer, so when I go the decals on I noticed partial fingerprints and other intolerable imperfections (after I put the decals on naturally). I spent much of the evening forensically sanding areas back and rebuilding the coat. Though it's a serious pain the the arse, I do quite enjoy these little problems. I've never had a bug free build and this was no exception - particularly since the airbrush had been playing up the whole time.

Weathering wise I've used a san coloured pigment powder and a black wash along with Tamiya panel liner for the staining near the nose. Though I've got my finished photo, I suspect I will revisit this and add some exhaust soot. In this house, a model is never truly finished. They're only ever waiting for their next weathering tweak.

As a rule it's best to stick with what you know. I like acrylics and venturing out on enamels was a mistake. Mixing up a desert pink isn't actually that hard. I started with red and white to make a barbie pink then topped it up with buff, a dash of desert yellow and to get it flatter, a light sky grey. I'm sure there's an easier way but that's the way the experiment went. You develop an instinct over time.

I think next I'll be having a bash at the Revell Tornado GR4. The Bucc and the Tonka sitting together is a nice shelf combo. Though I think I'll stick with the medium sea grey for that one. 

Finishing, washes and decals


Before I go any further I would like to point out that everything I write is just my opinion and you can take it or leave it. There are plenty of ways to skin the cat. Some succeed with methods I failed at and vice versa. Discussions on social media can get unnecessarily heated.

On the subject of finishing a model, I've been through a lot of trial and error. The truth be known that a good modeller never stops experimenting. Things that haven't worked for me in the past may work for me in the future so I keep repeating experiments. I find it useful sometimes, instead of starting a new kit, to revisit and refurbish older kits and incorporate new lessons.

I started out with the Humbrol varnishes and I found them to be problematic. You can't really do any further washes and weathering until it's fully dried and cured which could be anywhere up to forty eight hours. That doesn't really suit my timetable. I enjoy blitz building, not least because I don't have the space to prolong a build. Moreover, gloss coats, particularly the enamel ones, never fully dry if not mixed correctly. It's caused me endless headaches after applying wash fluids which then don't come off. .The technique I settled on was to do a gloss coats for the application of decals then a further coats to apply washes, then a finishing coat for the desired finish. In theory that is. In practice, I never found a good gloss coat until someone suggested Pledge all purpose floor polish.

I fell in love with it immediately. It's self-levelling, meaning you can brush it on without leaving brush strokes and it dries within minutes and you can get back to work very rapidly. As a rule I try to leave it about twenty minutes but I'm not a patient individual (which causes me most of my problems).

I now use it as a mainstay and then apply washes over it. Humbrol weathering powders are great for this but the indispensable wash is made by Flory Models, particularly their Dark Dirt wash. I came across Flory washes from one of their instructional videos on Youtube, and I've used it ever since. The one word of warning is that  it sometimes takes some serious elbow grease to wipe it all off and sometimes requires a little bit of touch up work with the airbrush. Though that's probably more to do with my overall incompetence.

For this I find microfibre cloths are the best because they don't leave the bits of lint that other fabrics and kitchen roll do. A simple dark wash will do more for an aircraft than a dozen other techniques and sometimes you don't need to do very much more - as per the photo above. One of the skills of modelling is knowing when to stop. Sometimes less really is more. You'll hear me say that a lot.

When that's done it never hurts do do a sealing coat with the floor polish before adding decals. More advanced modellers will apply the wash after decaling for realism, but I invariably end up rubbing the decals off even if I do a sealing coat. I admitted defeat on that one.

Decaling is probably worth a dedicated post but it's all part of the finishing process which is why I talk about it here. Decaling can be a long, slow and infuriating process, particularly with large decals and ones designed to fit the body. This is where it real helps to have refined your painting process to ensure the receiving surface is as smooth as it can be. If you've had "orange peel" issues, you can level this out with extra coats of polish/varnish, but you're still going to have problems with trapped air which leads to decal silvering. I'll do a dedicated post on fixing silvering later on. 

There are a number of decal solutions on the market that assist with the process. The industry standard that everyone seems to swear by are the Micro Sol and Micro Set solutions. Personally I've had no success whatsoever with them and find they tend to shrivel and destroy decals too often. Again that's probably my incompetence so you may wish to give it a try anyway. Instead I use Humbrol's Decalfix, though heavily diluted with water. I'm not sure what actual difference it makes and I've noticed that if your surface preparation is done well and the decals are thin enough (some are often quick thick) then no decal solution is required at all.

What I found with decal solutions, particularly before I switched to the Pledge floor polish, is that decal solutions will eat into varnishes, leaving a frosty corroded patch on the paintwork. This is easily corrected with an overspray of whatever varnish you used but with dedicated varnishes, too much can result in a dulling of the finish and an overall white frosting. Perhaps thinning the varnishes helps though you have to be sure to use the right thinner for the product you're using. I think my earlier problems are similar to my earlier issues with paint, attempting to do it all at once and probably at the wrong pressure. It's probably worth researching if varnishes respond to different pressures. 

I've found, though, that the floor polish is a bit of a "wonder drug". Most of my finishing problems went away after the switch. But that then leaves the question of the final finishing coats. Here I've found the water based Vallejo satin and matt coats are pretty good. The matt coat is a lovely rich matt that sucks the light out of the room but if you are using it you have to be sure it is your final action because it tends to rub off and may need a repeat coat over time. There are gloss patches on a Sepecat Jaguar I have where I picked it up with my bare hands.

As yet I haven't found a slam dunk solution for a finishing coat, and I tend to find that the floor polish, if applied thinly and sparingly leaves a more satin coat. It only goes high gloss after three coats. The satin coat is actually nicely muted so you can just leave it at that. Matt coats tend to be a magnet for dust and the aircraft are then harder to clean. Leaving them as satin at least gives me the option in future if ever I do find an absolute solution.

With just washes and selective application of weathering powders for streaks (applied with an old fashioned paintbrush) you can make a model that starts to look like the real deal. In conjunction with the more ambitious techniques such as pre-shading, you're then entering a different league of modelling and on your way to producing professional looking builds.

One little indispensable asset in my toolset is the Tamiya panel line fluid. As it happens, I tend not to use it for panel lines. I tend to find it stains where you don't want it to stain and it doesn't really do anything that a wash or weathering powders (in conjunction with pre-shading) doesn't. The fluid, though, comes with its own syphon applicator brush and by using capillary action it's absolutely ideal for whole panel staining, wheels and landing stalks. I've found many abstract uses for it. Lately I have used it for panel lines but applied with a finer paint brush for greater accuracy. Nothing says you have to use the applicator brush. When it does go wrong, cotton buds dipped in white spirit will fix most problems.

Finally, you can have some fun at the end with a water based rust fluid. You can discreetly wash corners of flaps and streaks from hinges for that added bit of realism. It takes time to perfect and it's worth looking at how the masters do it on Youtube.

Ultimately, when it comes to the finishing, there's only one way to do it - and that's your own way that you develop over time. You'll establish your own techniques and refine them, taking inspiration from others. If something is working for you, don't let anyone discourage you. This is an art, not a science - and in the end, unless you're gunning for competition standard, you have only yourself to please. Do whatever's fun. That is the point, after all. 

It's all about the airbrush


The main reason to get into airbrushing is to do all the things a paintbrush can't. I persisted with brushes for many years and though you can do a decent job, there are certain effects that just aren't possible. Camouflage edges are always going to be hard lines. The first mistake with airbrushing, though, is to assume that soft thin edges are easy. I've been going at it for two years and have only ever got the right result once and entirely by accident. The edges are always either too wide or too hard.

But before I get into that, I want to talk about my first major mistake. My first serious attempt at a high quality job was a complete abortion. I built the Hasegawa F4E Wild Weasel. I ended up stripping it at least three times with Mr Muscle. The problem was surface powdering which I first thought was the paint reacting to the primer. My means of correcting it was to paint over it which just made it worse.

It turns out that it's everything to do with the pressure. I was spraying at maximum pressure, when really most jobs need to be around 20psi. The paint was drying before it hit the surface. I still have problems with this which leads to an orange peel effect which is now a matter of achieving the right paint consistency.

At first I used rather a lot of paint, pouring the paint directly from the bottle without thinning. Tamiya paints will allow it. The rule, though, is to always thin the paints. If it's meant to be sprayed straight from the bottle it will say so. Tamiya paints will need about one part in five just to get started.

My main main problem was impatience. Thinner paints take longer to complete an area and it has to be done in stages whereas I preferred to do it in one action. Cutting those corners as I alluded to in the previous post. But there are no shortcuts in this game if you want to get it right.

But that also spoke to my misapprehension about airbrushes. I was looking at it as a means to fill an area with paint - sort of like MS Paint. But it's not that. An airbrush is so much more. It's a blending tool and once you start down the road of pre and post shading you never look at it the same way again. Still, though, you have to go through these trials of discovery. Now I'm getting into the serious leagues.

Pre-shading is a tricky business. It involves painting along the panel lines with a dark colour, usually black, with the intention of over spraying the colour coat but still showing residual line blurring. It doesn't have to be every line and it doesn't have to be particularly accurate - which is just as well given how wobbly my lines are. With practice you get better and as with anything else, you do a better job by taking your time over it and not being in a hurry. The persistent lesson with virtually everything has been to slow it down and be more patient.

My first few trials with pre-shading failed completely. I didn't allow enough drying time between sweeps and kept adding new layers, failing to appreciate that coats thicken as they dry - so the final coat would end up erasing the panel highlights completely. Overcoming that takes some self-discipline.

Where I've found it quite difficult is with white coats. White is a nightmare to work with and I always end up using a lot of it. The answer, it seems is not to use a hard black panel highlight and instead use a middle grey so you don't need as many coats. Do this for all lighter colours. Many of the problems later come from the white coat being too thick.

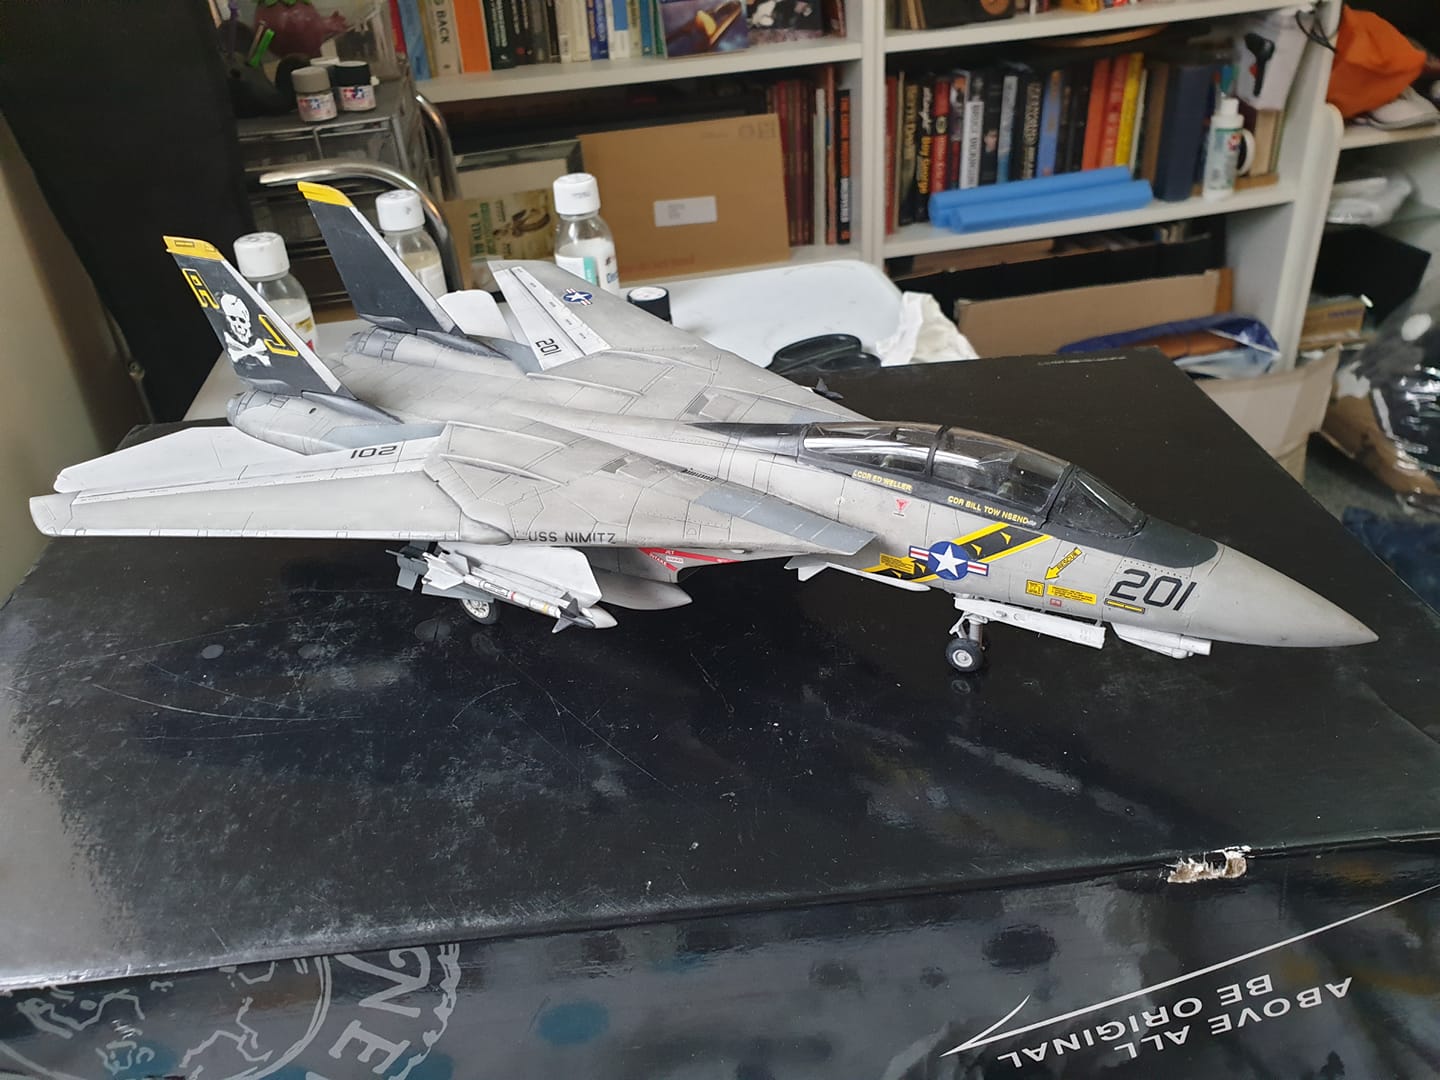
My first and most successful attempt at this was a recent refurb job of an F15. Big fighter jets really do lend themselves to this kind of style and the F15 is a nice canvass to work with - as is the Tomcat which is why just about every serious aircraft modeller has made one. The F14 lends itself to more advanced techniques such as marbling and off-colour panels which I will go into later down the line. I have one in the stash for the near future.

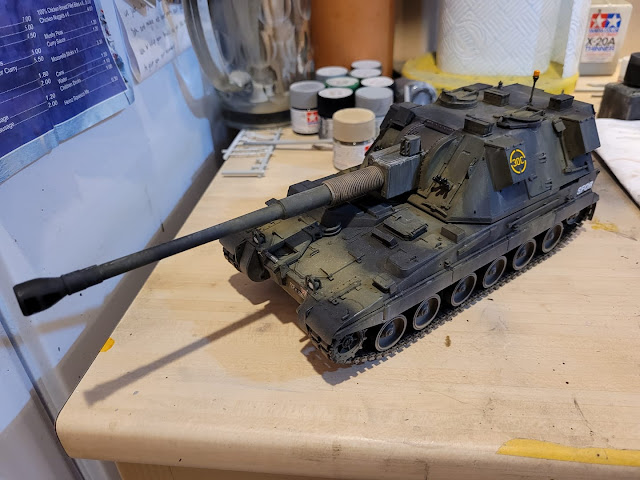
Curiously this panelling technique also works well on armoured vehicles. Especially things like the M5 Stuart and the welded hull Sherman. Black edges with a lighter olive overspray will set it off nicely. I prefer to keep it subtle for realism. I'm of the view that overdoing it just to show off that you can do it makes for a cartoonish model and they look especially silly with figurines. See Bradford Exchange kitsch.

There's also the question of scale. Take the Phantom for instance. They do get pretty battered in real like, but if you replicate every bit of weathering, you end up with model that's just too busy and looks a mess - especially if you add all of the smaller decals which don't really add anything and are not really visible on the real thing. For me it's less about absolute accuracy as producing a convincing representation where sometimes less really is more.

Where the airbrush comes into its own is with weathering effects. One of the first things I tried with armoured vehicles was an extra thin brown misting overspray around the running gear and skirts. Together with a cement colour wash, you can turn just about any vehicle into a professional looking build.

The difference between aircraft and armour though is chalk and cheese. Vehicles are mainly about having fun with mess, getting creative with weathering and rust, whereas aircraft are far less forgiving. That's where accuracy matters. Bad weathering will ruin a well painted aircraft. The way to approach it is to treat the entire painting process as the weathering process, rather than dolling it up then dirtying it. When you change your mindset to that philosphy you do see dramatically different results - particularly with vehicles.

As mentioned above, aircraft camouflage is trickier. doing in single colour aircraft like an F15E is relatively straightforward but two and three colour schemes like the RAF green/grey and the Vietnam USAF scheme are a bit more involved. The trick seems to be rolled our sausages of blu-tac but there's still an art to it and it may require selective masking in order to get the right edges. Only practice and experimentation can teach you what you need to know. I have done one or two entirely free hand, which works well on larger models but doesn't quite give you the edge definition. It looks good though if you're after a heavily weathered and aged look.

As it happens, you can get away with aa lot of mistakes in the main scheme if everything else is tight. I recently did a Lightning in the RAF green/grey and though there were variances in the camouflage edges, it didn't matter because the missiles, canopy, landing gear and decals were bang on. Only the model inspector types would ever take issue with it. In most cases, if the canopy is right and the cockpit detail passes muster, you can get away with flaws in the main scheme. Though I don't advise cutting corners or letting things go, you are allowed a certain artistic licence.

As to combining the pre-shading with camouflage, that's a whole other story and a a more advanced level of painting I will do a dedicated post on. It's combination of all of the above. It helps if you have a model that's sympathetic to your aims which is why the SU-27 is a modelling favourite.

As an aside, if you're doing a bare metal scheme such as a Mustang or Superfortress, it's always worth investing in the more expensive metal colour specialist paints. The generic aluminium paints in the Tamiya/Humbrol range are grainy and won't give you a satisfying finish. I'm currently playing with the Vallejo metal colours and they really are superb - especially when getting into more advanced painting of exhaust nozzles and mismatched panels.     

What they don't tell you about airbrushes is that they're an absolute f***ing nightmare. They are great when they're behaving but when they're not you can spend entire days in a rage trying to get them working. You can strip them and clean them an still have problems. The general rule is to strip and clean then strip and clean again. If then you still have a problem then a new nib will probably sort it - particularly if you're getting back bubbles in the paint cup.

If you're new to airbrushing you've probably bought an entry level brush to start with. You may think that spending a lot of money on a better one will yield improvements. This is only partly true. I'm of the view that when you know how to use them, there is not a lot of difference between a decent branded airbrush and a generic cheap Chinese import. I always have the latter as a backup. The one thing that buying an expensive airbrush does for you is remove the question of the brush from the equations as to why your models suck. That alone is worth it. 

Most problems are usually down to a blockage somewhere. If problems persist, it might be down to the airbrush cleaner. I have in the past used Vallejo airbrush cleaner but it's so tame I wonder if it's got any active chemical in it at all. I now use the Spraycraft aerosol which gets paint off just about everything.

One of the things I've learned is that sometimes it's just going too wrong to salvage. You can try correcting but you'll regret it if you persist. Don't be afraid to simply start over. For this I cover the model in Mr Muscle Oven foam and put it in a plastic bag for a few hours. You then rinse under a tap and if needs be agitate the surface with an old toothbrush. It will strip it right down to the primer. In some cases the paint will then go on even better than before - especially if the primer originally dried a little glossy.

There's a lot more to say on this subject but I just wanted to do a basic introduction and outline a few of the first lessons. Most of this you will have to dicover for yourself but it helps to have the warning. everything I learned was through trial and error at great expense. But then if you're worried about the expense, find a different hobby. There isn't a cheap or quick way to do it. That, I suppose, is the first and most important lesson. It's a commitment.